Making homemade candles has become a fun activity with my mum. During the colder months, there are candles lit every evening and we burn through them like there’s no tomorrow.
We decided to learn how to make a candle re-cycling old, cleaned candle containers and enjoy maximum burn time on a budget.
Especially during the Christmas period, learning how to make candles is not only a fun activity but a homemade gift is always appreciated. Learn the candle making basics and create customised scents, colours and decorative details such as ribbons to tie around the container or personalising with inscriptions.
Learning how to make candles at home is also great if you’re on a budget – enjoy your favourite luxury scents without the price tag!
Check out this basic candle making guide:
Time needed: 1 hour
- Prepare Containers and Secure the Wicks
- Weigh the Wax
- Melt the Wax
- Customise your Candle!
- Pouring the Wax
- Trim the Wick
As an Amazon Associate, I earn from qualified purchases. If you do make a purchase from my site, I’ll get a small referral fee, at no extra cost to you, which helps me run the site! Read more about it in my Disclaimer.
Homemade Candle Supplies:
(a lot of these candle making supplies you will already have in your home)
- Candle containers – you could purchase these online, re-use your old candle jars/pots or head to the charity shop to pick up some heat resistant glass containers.
- Bain-Marie (eg metal bowl/large pan in which the bowl will sit comfortably)
- Spatula
- Blu Tack
- Wooden Skewers
- Candle Wicks
Ingredients:
- Candle Wax
- Fragrance Oil/ Colouring
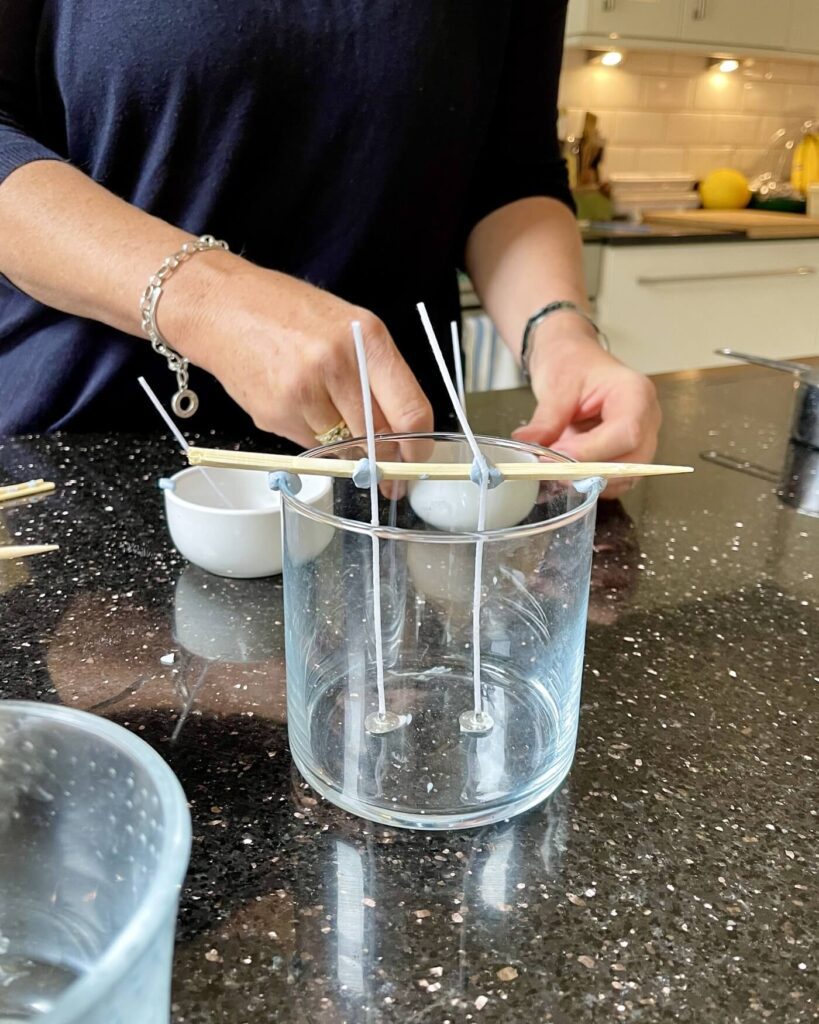
Step 1. Prepare Containers and Secure the Wicks
Firstly ensure the container is thoroughly clean, and then assess how many wicks you will need (smaller containers need only one, larger ones two or three).
There are are a number of ways to secure candle wicks in the base of the container. We used tiny double sided sticky pads (cut into smaller pieces for economy) or you can dip the wick base in melted wax and then place carefully inside.
We then attach a wooden skewer on the rim of the container using small balls of Blu Tack, and then use a small ball on the wick stem to attach to the skewer so it stands upright (see photo). The skewers and Blu Tack can be re-used for future candles!
Step 2. Weigh the Wax
The second step for making a candle is to weigh the wax flakes into a metal bowl (or suitable heat resistant container). We usually use 1kg of flakes which will make about 6 medium-sized candles.
We use C5 soy wax flakes which can be bought from candle suppliers.
The more you order, the less you pay. In this case we ordered 5kg wax, which came to approximately £25.

Step 3. Melt the Wax
For this step of the candle making process, place your metal bowl over a pan of boiling water (bain-marie). Melt the wax slowly on a low heat. Stir with a heat resistant tool, eg wooden spatula until wax is completely melted.
The wax will melt quickly so don’t leave unattended!
Test the temperature with a candle making thermometer once melted – it should be around 80 degree celsius.

Step 4. Customise your Candle!
Once melted, turn off the heat and carefully remove your container onto a cool surface.
Let the melted wax stand until cooled to 60-70 degrees – stir occasionally.
Now the fun part – add your colour and/or scent to create a bespoke homemade candle! For 1kg of wax flakes use 100ml of fragrance oil ie 10%. Nb you can purchase replica scents of popular candles e.g. The White Company. You can also use essential oils but check quantities before adding.
Pour in the scent and stir for approximately 2 minutes.

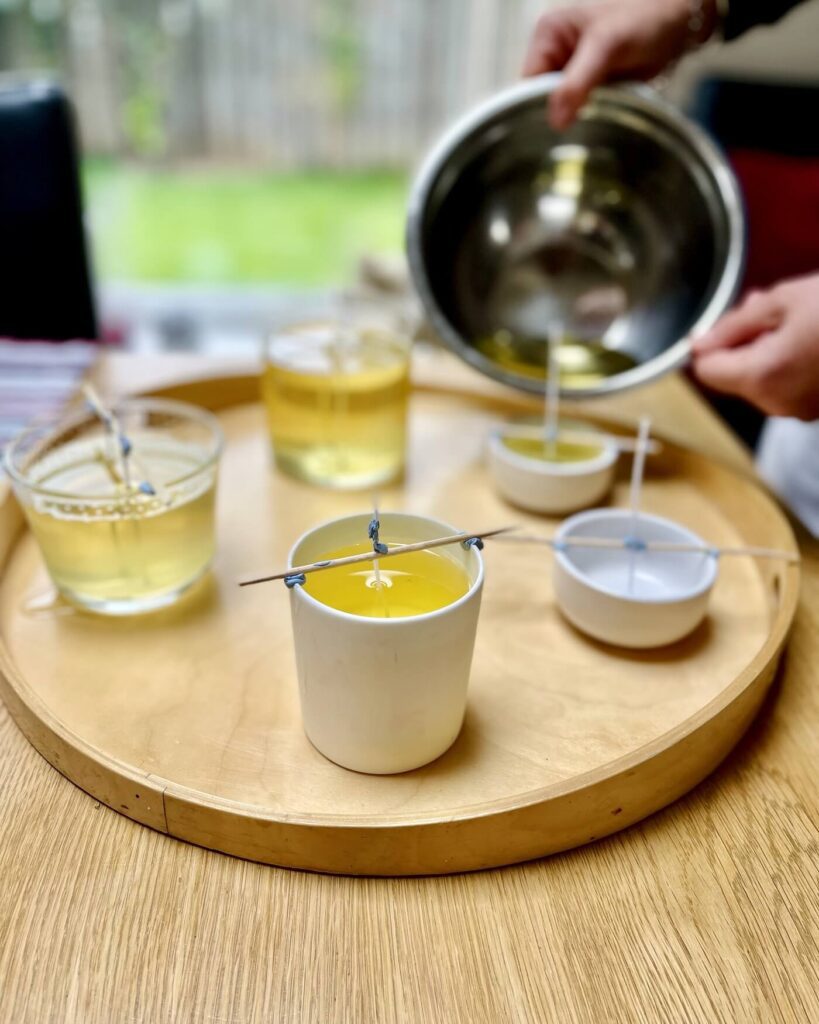
Step 5. Pouring the Wax
Carefully pour your scented wax into your containers, avoiding the wick and edges of the container. Pour to approximately 1-1.5cm below rim of the container.
Leave candles to set at room temperature for 24 hours.
Step 6. Trim the Wick
Once set completely, remove the Blu Tack and wooden skewers (keep to re-use).
Trim the wick to size – about 1cm above the wax.
Voila – now you know the candle making steps, enjoy your homemade candles!

Tip: the first time you light your candle, let them burn until wax has melted as far as possible to the edge of the container and blow out – if the wax only melts in a small puddle around the wick the wax won’t melt further out for future burns.
For more advice on making homemade candles, check out Alice’s Candle Advice.
I use my homemade candles most when hosting a dinner party. Now you have your candles ready, check out my key hosting tips for friends and family.
SHOP THE POST


